The Oregon Scientific Projection Clock combines innovative time-keeping with advanced features like weather forecasting and motion sensors, offering a sleek, user-friendly design for modern homes.
1.1 Overview of the Oregon Scientific Projection Clock
The Oregon Scientific Projection Clock is a versatile time-keeping device that projects time, weather, and alarms onto walls or ceilings. It combines a sleek design with advanced features like motion sensors, weather forecasting, and customizable settings, making it a practical and stylish addition to any room.
1.2 Key Features and Benefits
The Oregon Scientific Projection Clock offers a range of features, including a self-setting atomic time, weather forecasting, motion sensors for hands-free operation, customizable projection brightness, and multiple alarm settings. These features provide convenience, accuracy, and personalized use, enhancing user experience while maintaining a sleek and modern design for any home environment.

Setting Up the Oregon Scientific Projection Clock
Unpack and prepare the clock, install batteries, and follow the setup process to configure time zones and initial settings for optimal functionality.
2.1 Unpacking and Initial Preparation
Carefully unpack the Oregon Scientific Projection Clock, ensuring all components are included and undamaged. Remove any protective packaging materials and prepare the device for setup. Handle the clock with care to avoid scratching the display or projector lens. Before powering on, ensure the clock is placed on a stable surface and all accessories are within reach.
2.2 Battery Installation and Powering On
Insert the battery pack into the battery compartment, ensuring correct polarity. Gently press the pack into place and secure the compartment cover. Turn the D-ring clockwise to lock it. Plug in the power adapter or rely on battery power. Press the power button to turn on the clock, and it will begin functioning immediately, displaying the time and other features.
2.3 Time Zone and Clock Setup
Press and hold the time zone button to cycle through available zones. Use the +/- buttons to adjust the hour and minute settings. Press the enter button to save your preferences. The clock will automatically update and display the correct time for your selected zone, ensuring accuracy and convenience for users across different regions.
Projection Features and Settings
The Oregon Scientific Projection Clock offers advanced features for a clear and customizable display. Adjust brightness, focus, and projection modes to enhance your viewing experience anytime.
3.1 Understanding the Projection Function
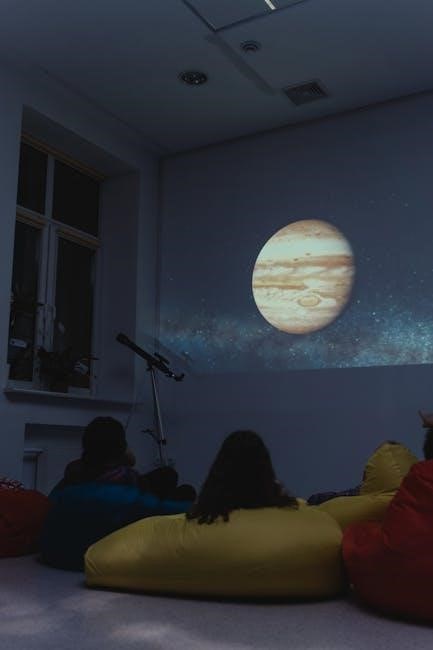
The Oregon Scientific Projection Clock projects time, weather, and alarms onto walls or ceilings, ensuring easy readability in the dark. The soft red glow minimizes eye strain, making it ideal for bedtime use. This feature is fully adjustable, allowing users to customize brightness and focus for optimal clarity and comfort in any setting.
3.2 Adjusting Projection Brightness and Focus
Adjust the projection brightness using the “+” and “-” buttons. Hold the buttons to fine-tune focus for clarity. The projection remains visible in both dark and bright environments, ensuring optimal readability. Use these settings to customize the display according to your preference, enhancing comfort and usability in any room setting.
3.3 Customizing Projection Display Options
Customize the projection display by selecting the data to show, such as time, date, or weather. Toggle between 12/24-hour formats and enable/disable weather icons. Adjust the projection duration using the settings menu. These options allow you to tailor the display to your preferences, enhancing both functionality and visual appeal for a personalized experience.
Weather Monitoring and Forecasting
The Oregon Scientific Projection Clock offers real-time weather monitoring, displaying current conditions and forecasts. It provides temperature readings and synced weather data, helping you stay informed indoors.
4.1 Built-In Weather Sensors and Data
The Oregon Scientific Projection Clock features built-in sensors that accurately measure indoor and outdoor temperature. It also receives forecast data, providing detailed weather updates. The clock displays humidity levels and weather alerts, ensuring users are informed about changing conditions. This integration makes it a versatile tool for both timekeeping and environmental monitoring, enhancing daily convenience.
4.2 Reading and Interpreting Weather Forecasts
The Oregon Scientific Projection Clock displays weather forecasts with clear icons and text. It shows predicted conditions, temperature ranges, and humidity levels. Users can easily interpret symbols like sun, rain, or clouds, representing different weather scenarios. The clock also projects this data onto surfaces, ensuring a convenient and visually accessible way to stay informed about upcoming weather patterns.
The Oregon Scientific Projection Clock can connect to external weather services, providing real-time updates. Users can link their device to apps or platforms for accurate forecasts. This ensures the clock displays the most current weather data, enhancing reliability and convenience for users who rely on precise weather information. The Oregon Scientific Projection Clock offers customizable alarms with adjustable tones and volumes. The snooze feature allows users to pause alarms temporarily, providing flexibility for waking up comfortably. To set an alarm, press and hold the ALARM button until the alarm time flashes. Use the +/- buttons to adjust the hour and minute. Press ALARM to save. Multiple alarms can be set, and each can be enabled or disabled. The clock also features a motion sensor to snooze alarms with a wave of your hand for added convenience. Press the SNOOZE button or wave your hand near the motion sensor to activate snooze. The alarm will pause for 10 minutes. Repeat to extend snooze time. For optimal use, set snooze intervals in the alarm settings menu to customize your wake-up experience and avoid oversleeping. Press and hold the ALARM button to cycle through built-in tones. Use the + or ー buttons to adjust volume levels. Motion sensors can also mute or snooze alarms. For a peaceful wake-up, select the gradual increase tone or nature sounds. Ensure the volume matches your preference for uninterrupted sleep and a refreshing morning routine. Discover advanced features, including motion sensors, customizable themes, and smart connectivity, designed to enhance functionality and personalize your Oregon Scientific Projection Clock experience effortlessly. The Oregon Scientific Projection Clock features integrated motion sensors, enabling hands-free operation. Simply wave your hand to control alarms or adjust settings without touching buttons. This innovative feature enhances convenience, especially in low-light conditions. The sensors are responsive and customizable, allowing users to tailor sensitivity for seamless interaction, making it a practical solution for everyday use. The Oregon Scientific Projection Clock offers customizable display settings, allowing users to adjust brightness, color themes, and layout. Access the menu by pressing and holding the settings button. Choose from multiple display options to personalize your clock’s appearance. Adjustments are saved automatically, ensuring your preferred settings remain active. This feature enhances both functionality and aesthetic appeal for a tailored experience. The Oregon Scientific Projection Clock supports wireless connectivity, enabling seamless integration with external devices. It can sync with weather services for real-time forecasts and connect to smart home systems. Built-in Wi-Fi allows for firmware updates and remote control via compatible apps. This smart feature enhances functionality, ensuring your clock stays connected and up-to-date with the latest technology advancements. Regularly clean the clock with a soft cloth and avoid harsh chemicals. For troubleshooting, reset the device by pressing and holding buttons or removing batteries. Ensure sensor accuracy and proper connectivity for optimal performance. Refer to the manual for detailed instructions on resolving common issues and updating firmware. Use a soft, dry microfiber cloth to gently wipe the clock’s exterior and projection lens. Avoid harsh chemicals or abrasive materials that may damage the screen. For stubborn marks, lightly dampen the cloth with water, but ensure the clock is dry before operating. Regular cleaning prevents dust buildup and maintains clear projections. Avoid direct sunlight exposure to preserve display quality. Common issues include projection blur, sensor malfunctions, or lost time accuracy. Adjust focus by rotating the lens for clarity. Ensure motion sensors are within range and free from obstructions. Reset the clock if time accuracy is lost, and verify power sources. Refer to the manual for detailed troubleshooting steps to resolve these issues effectively. Regular firmware updates ensure optimal performance. Check for updates via the clock’s menu or Oregon Scientific’s official website. Use the provided USB cable to connect to a computer. Follow on-screen instructions to download and install updates. Ensure the clock is fully powered during updates to prevent interruptions. Refer to the manual for detailed guidance on updating procedures safely and effectively. The Oregon Scientific Projection Clock offers a blend of functionality, style, and innovation, making it a practical and versatile addition to any home or office setting. The Oregon Scientific Projection Clock is a standout device, offering a perfect blend of style, functionality, and innovation. Its ability to project time and weather, along with user-friendly features like motion sensors, makes it a convenient and modern addition to any room. The clock’s sleek design and advanced capabilities ensure it meets the needs of today’s tech-savvy users while maintaining simplicity for everyday use. With its reliable performance and versatile features, it remains a top choice for those seeking a practical yet sophisticated time-keeping solution. For the best experience with the Oregon Scientific Projection Clock, ensure the projection surface is clear and adjust brightness for optimal visibility. Regularly clean the lens to maintain image clarity. Position the clock in a central location for accurate motion sensing. Set alarms strategically and use the snooze feature wisely. Sync with external weather services for precise forecasts and update firmware regularly for enhanced performance. Visit the official Oregon Scientific website for user manuals, guides, and FAQs. Explore online forums and communities for troubleshooting tips and shared user experiences; The official Oregon Scientific website provides comprehensive manuals, user guides, and troubleshooting resources for their projection clocks. These documents are available in PDF format, offering detailed instructions for setup, operation, and maintenance. Visit the support section to download specific product manuals tailored to your device model for optimal functionality. Online forums and user communities provide valuable resources for Oregon Scientific Projection Clock users. These platforms offer troubleshooting tips, user-generated guides, and discussions about product features. Experienced users often share insights and solutions, making them an excellent supplement to official documentation for resolving issues or optimizing device functionality. Oregon Scientific is a renowned global brand specializing in innovative technology products, including weather monitoring and smart home devices. Known for quality and reliability, they deliver cutting-edge solutions. Oregon Scientific is a global leader in designing and manufacturing innovative consumer electronics. Founded with a commitment to delivering high-quality, user-friendly products, the company specializes in weather stations, projection clocks, and smart home devices. Their products integrate advanced technology with practical features, catering to both home and professional environments, ensuring reliability and customer satisfaction worldwide. Oregon Scientific offers a diverse range of products beyond projection clocks, including weather stations, atomic clocks, and GPS devices. Their weather stations provide real-time data, while GPS models like the Oregon 650 cater to outdoor enthusiasts. Additionally, they produce smart home devices and alarm clocks with motion sensors, showcasing their commitment to integrating innovative technology into everyday life seamlessly. Oregon Scientific offers comprehensive warranty options and dedicated customer support to ensure product satisfaction. Users can access resources, manuals, and contact details for assistance with their projection clocks. Oregon Scientific provides a limited warranty covering manufacturing defects for a specified period. The standard warranty typically lasts 1-2 years, depending on the model. It covers repairs or replacements for faulty components. Extended warranties may be available for purchase. Ensure proper product registration and maintenance to validate warranty terms. For assistance, visit Oregon Scientific’s official website for support resources, including manuals and FAQs. Contact customer support via email or phone for troubleshooting or repairs. Ensure to provide product details like model number for efficient service. Support teams are available to address queries and guide users through resolving issues promptly and effectively. Common questions include setup, troubleshooting, and customization. Refer to the manual for detailed guidance on these topics. Common questions include troubleshooting power issues, adjusting projection clarity, and syncing weather data. Solutions often involve resetting the device, cleaning the lens, or updating software. For optimal performance, ensure proper battery installation and refer to the manual for detailed guidance. Regularly check sensor accuracy and adjust settings as needed for reliable operation. For technical issues, contact Oregon Scientific’s customer support via their official website or phone. Repair options include authorized service centers and warranty claims. Refer to the manual for troubleshooting guides. Visit the official website for FAQs, user manuals, and software updates. Ensure all repairs are done by certified technicians to maintain warranty validity and device performance.4.3 Syncing with External Weather Services

Alarm and Snooze Functions
5.1 Setting and Managing Alarms
5.2 Using the Snooze Feature
5.3 Customizing Alarm Tones and Volume

Advanced Features and Customization
6.1 Motion Sensors and Hands-Free Operation
6.2 Adjusting Display Settings and Themes
6.3 Connectivity Options and Smart Features
Maintenance and Troubleshooting
7.1 Cleaning and Caring for the Projection Clock
7.2 Common Issues and Solutions
7.3 Updating Firmware and Software
8.1 Final Thoughts on the Oregon Scientific Projection Clock
8.2 Tips for Optimal Usage

References and Additional Resources
9.1 Official Oregon Scientific Documentation
9.2 Online Forums and User Communities

About the Manufacturer
10.1 Oregon Scientific Company Overview
10.2 Other Popular Products from Oregon Scientific
Warranty and Support Information
11.1 Understanding Your Warranty Options
11.2 Contacting Customer Support

Frequently Asked Questions (FAQs)
12.1 General Inquiries and Solutions
12.2 Technical Support and Repair Options