The Cessna 172 Skyhawk is a reliable single-engine aircraft widely used for training and personal flying. This checklist ensures safe and efficient operation, covering pre-flight, start-up, and landing procedures.
1.1 Overview of the Cessna 172 Skyhawk
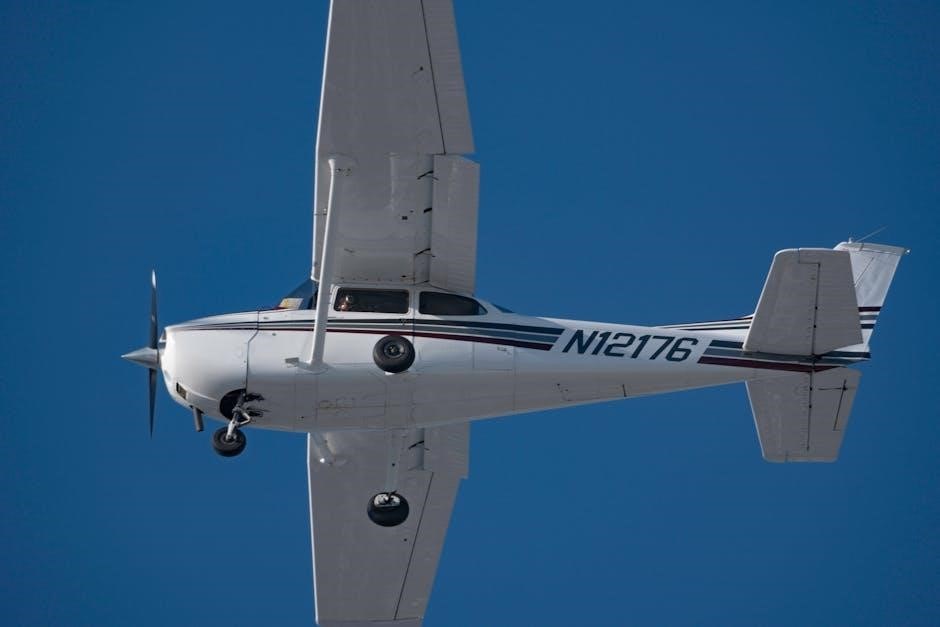
The Cessna 172 Skyhawk is a single-engine, high-wing aircraft renowned for its reliability and versatility. With a range of approximately 600 nautical miles, it is widely used for training, personal flying, and small cargo transport. The four-seat design offers comfort and accessibility, making it a popular choice for both novice and experienced pilots. Its docile handling characteristics and forgiving nature have solidified its reputation as an excellent training platform. The aircraft’s durability and performance make it a staple in aviation, suitable for a variety of missions.
1.2 Importance of Using a Checklist
Using a checklist is essential for ensuring the safety and efficiency of Cessna 172 Skyhawk operations. It helps pilots follow standardized procedures, reducing the risk of oversights and errors. A checklist serves as a memory aid, guiding pilots through critical steps from pre-flight inspections to landing procedures. By adhering to a checklist, pilots can maintain consistency, comply with regulatory requirements, and enhance overall flight safety. Regular use of a checklist also fosters good habits and preparedness, making it an indispensable tool for both novice and experienced pilots.
Pre-Flight Inspection Checklist
The pre-flight inspection ensures the Cessna 172 Skyhawk is airworthy. It includes exterior checks for damage, interior verification of controls, and confirmation of necessary documents on board.
2.1 Exterior Inspection
The exterior inspection ensures the aircraft is airworthy. Check for damage, proper control surface movement, and secure tires. Verify fuel quantity and absence of leaks. Remove any control locks and ensure all surfaces are clean and free of obstructions. Inspect the propeller for damage and the cowling for security. Confirm all antennas are intact and the landing gear is properly secured. This step is critical for safe flight operations and must be conducted methodically.
2.2 Interior Inspection
The interior inspection involves checking essential systems and controls. Ensure all required documents, such as ARROW, are on board. Verify the radio master switch is off and the ignition switch is in the correct position. Check the fuel selector, cycling it before setting it to “Both.” Test flight controls for freedom and proper movement. Ensure the hobbs/tach time is recorded and the mixture is set to idle/cutoff. Confirm the elevator trim is neutral for takeoff. Inspect instruments, circuit breakers, and ensure no warning lights are illuminated. This step ensures all interior systems are functional and ready for flight.
2.3 Control Locks and Documentation
Ensure all control locks are removed to prevent any restrictions during flight. Verify the presence of required documents, including the aircraft registration, airworthiness certificate, and pilot’s operating handbook. Check the fuel selector, cycling it to ensure proper function before setting it to “Both.” Confirm the radio master switch is off and the ignition switch is in the correct position. Ensure the hobbs/tach time is recorded and the mixture is set to idle/cutoff. Verify flight controls are free and functioning correctly. This step ensures all interior systems are functional and ready for flight.
Engine Start-Up Procedure
Prime the engine, set throttle to 1,000 RPM, and slowly lean the mixture until RPM rises slightly. Monitor instruments and ensure proper engine operation before taxi.
3.1 Pre-Start Checks
Before starting the engine, ensure the ignition switch is off and the fuel selector is set to “Both.” Cycle the mixture control to “Idle Cut-Off” and back to “Full Rich.” Remove any control locks and verify the throttle is at idle. Check the radio master switch is off to avoid unnecessary electrical load. Ensure all required documents, such as the aircraft registration and pilot certification, are on board. Finally, confirm the Hobbs meter and tachometer are functioning properly. These steps ensure a safe and efficient engine start.
3.2 Engine Start Process
Turn the ignition switch to “Start” and monitor the engine start. With the throttle set to 1,000 RPM, slowly pull the mixture control out until a slight RPM increase is observed. Secure the mixture in this position for taxi. After the engine starts, check the oil pressure and ammeter for normal readings. Ensure the radio master switch remains off to minimize electrical load. Once the engine is running smoothly, advance the mixture to “Full Rich” just before takeoff to ensure optimal performance during departure.
3.3 Post-Start Checks
After the engine starts, check the oil pressure gauge for proper readings and ensure the ammeter indicates a normal charge. Test the carburetor heat by applying full heat and observing a slight RPM drop. Cycle the fuel selector to ensure proper fuel flow. Verify that all electrical systems, such as lights and avionics, are functioning correctly. Ensure the radio master switch remains off to avoid unnecessary power drain. Finally, confirm the mixture is set to “Full Rich” for takeoff and that all instruments are within normal operating ranges before taxiing.

Pre-Takeoff Checklist
Ensure all cabin doors and windows are closed securely. Verify seatbelts and harnesses are fastened for all occupants. Check instruments for proper function and set heading indicator. Confirm fuel selector is on “BOTH” and mixture is “FULL RICH.” Test magnetos, cycle propeller, and ensure carburetor heat is off. Complete final checks for flaps, trim, and controls before advancing throttle for takeoff.
4.1 Cabin Preparation
Ensure all cabin doors and windows are securely closed. Verify that seatbelts and harnesses are properly fastened for all occupants. Check that electronic devices are in airplane mode and securely stowed. Confirm that all loose items in the cabin are properly secured to prevent movement during takeoff. Ensure the cabin is tidy, with no obstructions that could interfere with safety. Verify that the cabin heat and ventilation controls are set appropriately for passenger comfort. Finally, confirm that all necessary documents and checklists are within easy reach of the pilot.
4.2 Flight Control Checks

Perform a thorough check of all flight controls to ensure proper functionality. Move the control yoke through its full range of motion, checking for smooth operation and no binding. Verify that the rudder pedals and nosewheel steering respond correctly. Ensure the ailerons, elevators, and rudder move freely and in the correct direction. Check that the trim indicators are set to neutral or as per the aircraft’s configuration. Finally, cycle the flaps through all positions to confirm they extend and retract smoothly.
4.3 Final Configuration
Complete the final configuration for takeoff by setting the mixture to full rich and ensuring the carburetor heat is off. Verify that the flaps are set to the recommended position, typically 10 degrees for takeoff. Ensure the landing light is on and the radio frequencies are correctly set for communication. Confirm that all necessary documents, such as the aircraft registration and pilot certification, are on board. Finally, perform a last check of all systems, including fuel selector and ignition switch settings, to ensure everything is ready for a safe and efficient departure.
Cruise Procedures
Adjust power to 2000-2700 RPM and lean the mixture for optimal efficiency. Monitor instruments, including oil pressure and temperature, and adjust trim for stable flight.
5.1 Power Settings
During cruise, set power between 2000-2700 RPM for optimal performance. Adjust the throttle and mixture to maintain desired airspeed and fuel efficiency. Monitor engine instruments to ensure proper operation within recommended ranges. Lean the mixture as needed for altitude and temperature conditions. Maintain a steady RPM setting to avoid unnecessary engine stress. Regularly check oil pressure and temperature to ensure they remain within normal limits. Adjust power settings as needed to maintain desired flight parameters and ensure a smooth, efficient cruise phase.
5.2 Mixture and Trim Adjustments

Lean the mixture slowly during cruise to optimize fuel efficiency, monitoring RPM and engine performance. Adjust the elevator trim to maintain desired pitch attitude, ensuring smooth flight. Fine-tune the mixture for altitude and temperature changes, referencing the POH for guidance. Regularly check engine instruments to ensure proper operation. Adjust trim as needed for passenger or cargo load changes. Maintain a balanced setup to reduce pilot workload and enhance comfort during the flight. Monitor all adjustments to ensure they align with recommended procedures for safe and efficient cruising.
5.3 Monitoring Instruments
During cruise, continuously monitor engine instruments, including RPM, fuel flow, oil pressure, and temperature. Ensure the mixture is properly leaned for optimal performance. Keep an eye on altitude and heading to maintain flight path. Regularly check fuel levels and electrical system status. Adjustments to trim and mixture should be made smoothly, referencing the POH for specific guidelines. Monitor navigation and communication equipment for proper function. Any deviations from normal readings should be addressed promptly to ensure safe and efficient flight operations.
Pre-Landing Checklist
Adjust mixture to rich, set radio frequencies, and turn on landing lights. Ensure carb heat is on for any significant power reduction during approach.
6.1 Descent Preparation
Begin by reducing power to 1,500-2,000 RPM and leaning the mixture as needed. Adjust the elevator trim for a stable descent. Ensure the fuel selector is set to “Both” and monitor instruments for proper operation. Lower the nose slightly to maintain airspeed, typically around 70 MPH. Avoid steep turns and keep the aircraft configured for a smooth transition to the landing phase. Ensure all necessary checks, such as carb heat application, are completed before final approach.
6.2 Landing Configuration
Configure the aircraft for landing by setting the throttle to idle and advancing the mixture to full rich. Ensure the carburetor heat is on to prevent icing. Lower the flaps incrementally, typically to 10°, 20°, and finally 30°, as needed for the approach. Maintain a steady airspeed of 70 MPH and align with the runway centerline. Ensure the landing light is on and all seats, belts, and harnesses are securely fastened. Verify that the fuel selector remains on “Both” and all systems are ready for touchdown.
6.3 Final Approach Checks
During final approach, verify the landing configuration is correct, with flaps set appropriately and airspeed maintained at 70 MPH. Ensure the runway is clear of obstructions and align the aircraft with the centerline. Check for any malfunctions in systems and ensure the mixture is in the full rich position. Confirm the carburetor heat is on and the landing light is illuminated. Make final adjustments to pitch and yaw for a stable approach. Communicate with the tower or CTAF as required and ensure all settings are correct for a safe touchdown.
Post-Landing Procedures
After landing, reduce power and taxi carefully to the designated area. Shut down the engine, secure all systems, and ensure the aircraft is properly configured for safety.

7.1 Taxi and Shutdown
After landing, reduce power and taxi to the designated area. Ensure the mixture is set to idle cutoff, and the ignition switch is turned off. Secure the aircraft by engaging the parking brake and installing control locks. Monitor instruments to confirm shutdown, and ensure all systems are powered off. Chocks should be placed around the wheels for stability. Complete the post-flight checklist to ensure the aircraft is properly secured and ready for the next flight.
7.2 Securing the Aircraft

After shutdown, ensure the parking brake is set and control locks are installed. The ignition switch should be turned off, and all electrical systems powered down. Secure the fuel selector to the “off” position and ensure the mixture is in the idle cutoff. Install tie-downs to the wing and tail sections to prevent movement. Chocks should be placed around the wheels for added stability. Finally, verify that all access doors and compartments are closed and secured to protect the aircraft from environmental factors.

Emergency Procedures
Emergency procedures include engine failure protocols and system malfunction handling. Always prioritize safe landing practices and follow established checklists to ensure passenger and aircraft safety.
8.1 Engine Failure Protocol
In case of engine failure, prioritize a safe landing. Ensure the mixture is lean, throttle is idle, and carb heat is on. Check RPM for any recovery signs. Secure the engine if failure persists and declare an emergency. Land straight ahead if runway is insufficient. Maintain a safe airspeed and avoid sharp turns. Follow established procedures for engine failure to ensure passenger and aircraft safety. Always refer to the official Cessna 172 checklist for detailed protocols.
8.2 System Malfunction Handling
In case of system malfunctions, such as electrical or hydraulic issues, identify the problem promptly. Isolate affected systems to prevent further complications. Use backup systems if available and notify air traffic control if necessary. Refer to the aircraft’s POH for specific procedures. Ensure all safety protocols are followed to maintain aircraft stability. Regular maintenance and pre-flight checks can help mitigate system failures. Always prioritize passenger safety and seek assistance from air traffic control when needed. Proper handling of malfunctions ensures a safe and controlled outcome.

Additional Resources
Find official Cessna 172 checklists and supplementary training materials online. FAA-approved documents and instructional videos provide comprehensive guidance for pilots. Utilize these resources for enhanced safety and proficiency.
9.1 Where to Find Official Checklists
Official Cessna 172 Skyhawk checklists are available on the Cessna website, FAA resources, and through flight training organizations. These documents are typically in PDF format and specific to models like the C-172 N/P or Cessna 172S. Ensure you download from reputable sources to maintain accuracy and compliance with aviation standards. Many flight schools and aviation communities also provide verified checklists for training purposes. Always cross-reference with the aircraft’s POH for consistency. These resources are essential for safe and efficient flight operations.

9.2 Supplementary Training Materials
Supplementary training materials for the Cessna 172 Skyhawk include detailed video tutorials, flight simulation guides, and interactive checklists. These resources are available on aviation training websites, YouTube channels, and flight school platforms. Many materials are designed to complement the official PDF checklists, offering step-by-step explanations and real-world examples. Additionally, forums and pilot communities share practical tips and experiences. These tools are invaluable for both student pilots and experienced aviators, enhancing understanding and proficiency in operating the Cessna 172 safely and effectively. Always ensure materials align with FAA standards and the aircraft’s POH.