Welcome to the Oster Roaster Oven Manual! This guide helps you understand your appliance’s features, safety precautions, and optimal usage. Discover step-by-step instructions, troubleshooting tips, and maintenance advice.
Overview of the Oster Roaster Oven
The Oster Roaster Oven is a versatile and efficient kitchen appliance designed for roasting, baking, and broiling. With its spacious interior and adjustable temperature controls, it offers flexibility for various cooking needs. The oven features a user-friendly interface, preset settings, and a durable construction. Perfect for large families or gatherings, it ensures even cooking and effortless meal preparation. Its compact design and powerful performance make it a valuable addition to any home kitchen.
Importance of Reading the Manual
Reading the Oster Roaster Oven Manual is essential for understanding its features, safety guidelines, and proper usage. It provides detailed instructions for assembly, operation, and maintenance, ensuring optimal performance and longevity. The manual also includes troubleshooting tips and warranty information. By following the guidelines, you can avoid potential hazards, achieve consistent cooking results, and maximize the appliance’s capabilities. It’s a valuable resource for both novice and experienced users.
Safety Precautions
Always unplug the oven before cleaning and avoid immersion in water. Ensure proper ventilation and handle hot surfaces with care to prevent accidents. Follow all guidelines.
General Safety Guidelines
Always read the manual thoroughly before using your Oster Roaster Oven. Keep it away from flammable materials and children. Use oven mitts to handle hot surfaces. Ensure proper ventilation to avoid smoke buildup. Never insert metal utensils or leave the oven unattended while in use. Regularly inspect cords and components for wear. Unplug the oven when not in use and allow it to cool before cleaning. Follow all safety recommendations to ensure safe operation.
- Avoid overheating by monitoring temperature settings.
- Never immerse the oven in water or expose it to excessive moisture.
- Keep the oven on a stable, heat-resistant surface.
Electrical Safety Tips
Ensure your Oster Roaster Oven is plugged into a grounded electrical outlet to prevent shocks. Avoid using extension cords, as they may cause overheating. Regularly inspect the power cord for damage or fraying and replace it if necessary. Keep the cord away from hot surfaces and never touch electrical parts with wet hands. Unplug the oven when not in use to reduce electrical hazards.
- Always use the oven on a stable, heat-resistant surface.
- Avoid overloading circuits with multiple high-power appliances.
- Never operate the oven near water or in humid environments.
Understanding the Components
The Oster Roaster Oven features a control panel, cooking chamber, racks, and door seals. These components work together to ensure even cooking and safe operation.
- Control Panel: Manages temperature and timers.
- Cooking Chamber: Holds food for even heating.
- Racks: Allow air circulation for perfect roasting.
- Door Seals: Prevent heat from escaping.
Key Parts of the Oster Roaster Oven
The Oster Roaster Oven consists of essential components designed for efficient cooking. These include a control panel for temperature and timer settings, a cooking chamber with racks for even heat distribution, and door seals to retain heat. Additional features like a rotisserie kit and drip pan enhance functionality. Understanding these parts ensures optimal performance and safe operation.
- Heating Elements: Provide consistent heat for roasting and baking.
- Thermostat: Regulates temperature for precise cooking control.
- Viewing Window: Allows monitoring food without opening the oven.
Control Panel Features
The Oster Roaster Oven’s control panel is designed for intuitive operation. It includes buttons for selecting roast, bake, broil, and the Tender Roast function. A digital timer and temperature control allow precise adjustments. The panel also features a rotisserie setting and an LCD display for clear visibility. Preset cooking charts and optional accessories like the rotisserie kit enhance functionality, ensuring versatile and efficient cooking experiences.
- Function Buttons: Easily switch between cooking modes.
- Timer and Temperature Controls: Adjust settings with accuracy.
- Rotisserie Setting: Perfect for even cooking of meats.
- LCD Display: Clear visibility of current settings.

Assembly and Initial Setup
Begin by unboxing and inventorying all components. Place the roaster oven on a stable surface, ensuring proper ventilation. Plug in the appliance and perform a test cycle to ensure functionality.
- Inspect for damage or missing parts.
- Position on a heat-resistant surface.
- Plug in and run a test cycle.
Unboxing and Inventory
Carefully unpack your Oster Roaster Oven and verify all components. Check for damage or missing items, including the roasting pan, rack, and power cord. Ensure the oven, lid, and accessories are intact. Refer to the included packing list to confirm everything is accounted for. If any items are missing or damaged, contact Oster customer support immediately for assistance.
Step-by-Step Assembly Instructions
Begin by unpacking and placing the roaster oven on a stable, heat-resistant surface. Attach the legs firmly to the base to ensure stability. Next, position the roasting rack inside the oven cavity, aligning it with the rack guides. Connect the power cord to the oven and plug it into a nearby outlet. Double-check all connections to ensure they are secure. Your Oster Roaster Oven is now ready for initial setup and use.

Cooking Functions and Settings
The Oster Roaster Oven offers versatile cooking functions, including roasting, baking, and broiling. Adjust temperature and timer settings to achieve perfect results for various dishes, ensuring optimal performance.
Roasting, Baking, and Broiling Options
The Oster Roaster Oven offers versatile cooking modes, including roasting, baking, and broiling. Its advanced design ensures even heat distribution for perfect results. Adjust the temperature and timer to suit your recipe needs. The oven’s spacious interior accommodates large dishes, while the rotisserie rack adds convenience for evenly cooked meats. Whether roasting vegetables or broiling steak, this multifunctional appliance delivers consistent performance for a variety of culinary creations.
Using the Tender Roast Function
The Tender Roast Function ensures perfectly cooked, juicy meats every time. Press the Cancel button twice to reset the oven, then select the Tender Roast setting. Place your meat on the rack, set the temperature, and let the oven do the work. This function slow-cooks meat to tender perfection. For best results, refer to the cooking chart for recommended times and temperatures. Achieve flavorful, fall-apart dishes effortlessly with this convenient feature.
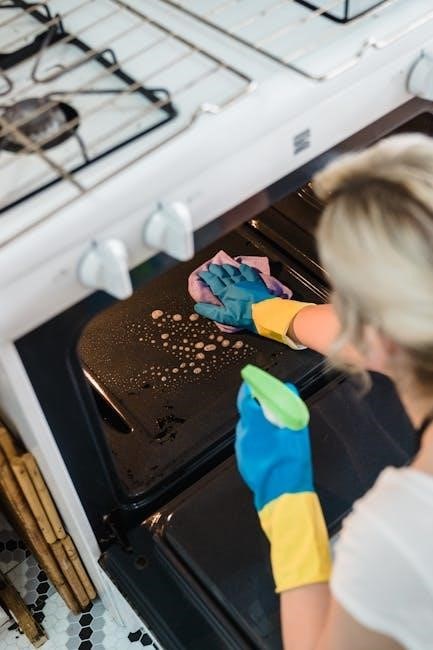
Cleaning and Maintenance
Regular cleaning ensures optimal performance. Unplug, let cool, then wipe with a damp cloth. Avoid immersion in water. Clean racks and pan with mild soap for lasting durability.
Pre-Cleaning Preparation
Before cleaning, ensure the Oster Roaster Oven is turned off and unplugged. Allow it to cool completely to avoid burns or damage. Remove any racks or pans and set them aside for separate cleaning. Wipe the exterior with a damp cloth to remove splatters. Avoid using harsh chemicals or abrasive scrubbers, as they may damage the finish. This preparation ensures a safe and effective cleaning process.
Effective Cleaning Techniques
For effective cleaning, use a damp cloth to wipe the exterior and interior of the Oster Roaster Oven. For tough stains, mix baking soda and water into a paste, apply it, and let it sit before rinsing. Avoid harsh chemicals to protect the finish. Regular cleaning ensures optimal performance and longevity.

Troubleshooting Common Issues
Troubleshoot common issues like error codes or uneven cooking by resetting the oven or checking connections. Refer to the manual for detailed solutions and repair guidance.
Identifying and Solving Errors
Common issues with the Oster Roaster Oven include error codes, uneven cooking, or the oven not turning on. Check the power connection and ensure the oven is preheated correctly. For error codes, refer to the manual for specific solutions. If the oven malfunctions, unplug it, let it cool, and restart. Persistent issues may require professional assistance. Always consult the manual for detailed troubleshooting guidance.
Resetting the Oven
Resetting the Oven
To reset your Oster Roaster Oven, unplug it from the power source and let it cool for 10-15 minutes. Plug it back in and press the “Cancel” button twice to restore default settings. For digital models, press and hold the temperature button until the display resets. This process resolves most software glitches. Always ensure the oven is cool before resetting to avoid any potential damage or safety risks.
Accessories and Additional Features
Enhance your cooking experience with optional accessories like rotisserie kits, baking pans, and racks. These tools optimize performance and expand your culinary possibilities. Visit the official website for more details.
Recommended Accessories
Enhance your Oster Roaster Oven experience with recommended accessories like a rotisserie kit, large baking pan, and wire racks. A drip tray is also suggested for easy cleanup. Additional items such as a grill rack or pizza stone can expand your cooking options. Visit the official Oster website or authorized retailers to explore these accessories and elevate your cooking versatility.
Optional Cookware for Optimal Results
For the best cooking experience, consider using stainless steel or silicone pans, which ensure even heat distribution and prevent food from sticking. A roasting rack is ideal for meats, while a pizza stone enhances crust crispiness. Non-stick baking sheets are perfect for roasting vegetables. These optional cookwares optimize performance and add versatility to your Oster Roaster Oven creations, ensuring delicious and evenly cooked dishes every time.

Recipe Ideas and Cooking Charts
Discover popular recipes like roasted chicken, vegetables, and tender roasts. Use the Cooking Charts for precise time and temperature guidelines, ensuring perfectly cooked meals every time with your Oster Roaster Oven.
Popular Recipes for the Oster Roaster Oven
Explore delicious and easy-to-make dishes like herb-crusted prime rib, roasted vegetables, and tender roasts. The Tender Roast Function ensures perfectly cooked meats, while the Cooking Charts provide precise time and temperature guidelines for optimal results.
From hearty casseroles to flavorful broiled fish, this oven offers versatility for every meal. Follow the manual’s recipe suggestions to achieve mouthwatering outcomes effortlessly, making cooking a breeze for all skill levels.
Cooking Time and Temperature Guidelines
Refer to the provided Cooking Charts for precise time and temperature settings. Roasting chicken requires 425°F for 45-60 minutes, while beef roasts need 325°F for 2-3 hours. Vegetables typically roast at 425°F for 20-40 minutes.
Use the Tender Roast Function for even cooking. Adjust settings based on food type and preparation. These guidelines ensure perfectly cooked meals every time, optimizing flavor and texture for a delightful dining experience.

Energy Efficiency and Cost Savings
The Oster Roaster Oven is designed with energy efficiency in mind, using less power than traditional ovens while maintaining superior cooking performance.
Optimal cookware enhances heat distribution, further improving efficiency.
Eco-Friendly Cooking Practices
The Oster Roaster Oven promotes eco-friendly cooking by using less energy than traditional ovens. Its efficient design reduces cooking time and heat loss, lowering overall power consumption.
- Use the Tender Roast function for even heating and faster results, minimizing energy use.
- Opt for eco-conscious cookware to enhance heat distribution and reduce cooking duration.
By adopting these practices, you align with sustainable cooking while enjoying delicious meals.
Reducing Energy Consumption
The Oster Roaster Oven is designed to minimize energy use while delivering exceptional results. Its efficient heating system ensures lower power consumption compared to traditional ovens.
- Use the Tender Roast function for faster cooking, reducing overall energy usage.
- Preheat only when necessary to avoid wasting energy;
- Opt for glass or ceramic cookware to retain heat and reduce cooking time.
These practices help reduce your energy footprint while maintaining delicious outcomes.
Congratulations on mastering your Oster Roaster Oven! With this guide, you’re now equipped to use your appliance efficiently, ensuring delicious meals while maintaining energy efficiency and safety.
Final Tips for Maximizing Your Oster Roaster Oven
Experiment with diverse cooking functions to unlock your oven’s full potential. Regularly clean and maintain your appliance for optimal performance. Use the tender roast function for perfectly cooked meats. Always preheat before cooking for consistent results. Explore recommended accessories to enhance your cooking experience. Refer to the cooking charts for precise temperature and time guidelines. Happy cooking with your Oster Roaster Oven!

Further Assistance
For additional support, visit Oster’s official website to download the full manual or contact their customer service team for personalized assistance and troubleshooting guidance.
Contacting Oster Customer Support

Contacting Oster Customer Support
For any inquiries or issues, visit Oster’s official website and navigate to the support section. Here, you can find contact information, downloadable manuals, and FAQs. Specific models like the Oster CKSTBRTW20 bread maker have dedicated support pages. Reach out to their customer service team for personalized assistance with troubleshooting or product-related questions.
Downloading the Full Manual
To access the complete Oster Roaster Oven Manual, visit websites like ManualsLib or Manua.ls. Search for your specific Oster model, such as the Oster CKSTBRTW20, to find and download the PDF manual. These platforms offer free downloads, ensuring you have comprehensive guides for setup, troubleshooting, and maintenance. This resource is essential for maximizing your appliance’s performance and addressing any operational queries effectively.